Friday, April 30, 2010

Installing the cupola 2

This is the front view of the barn showing our new cupola. We think it is just the right size. If you look at one of the older posts you can see my wife standing next to it.
Posted by Picasa

Day 3 of the barn build


The rafters being installed.


Working 20 feet off of the ground. They walked around like they were on the ground.


Installing the queen post. The Queen beam is 50 feet long and each bent had a Queen post with lateral stabilizers to keep the upper area from swaying in the wind. Here Anthony is talking on his cell phone which was an interesting dichotomy to other customs they have. No radios and no Internet allowed by their church.
Posted by Picasa

Wednesday, April 28, 2010

Day 3 part 2


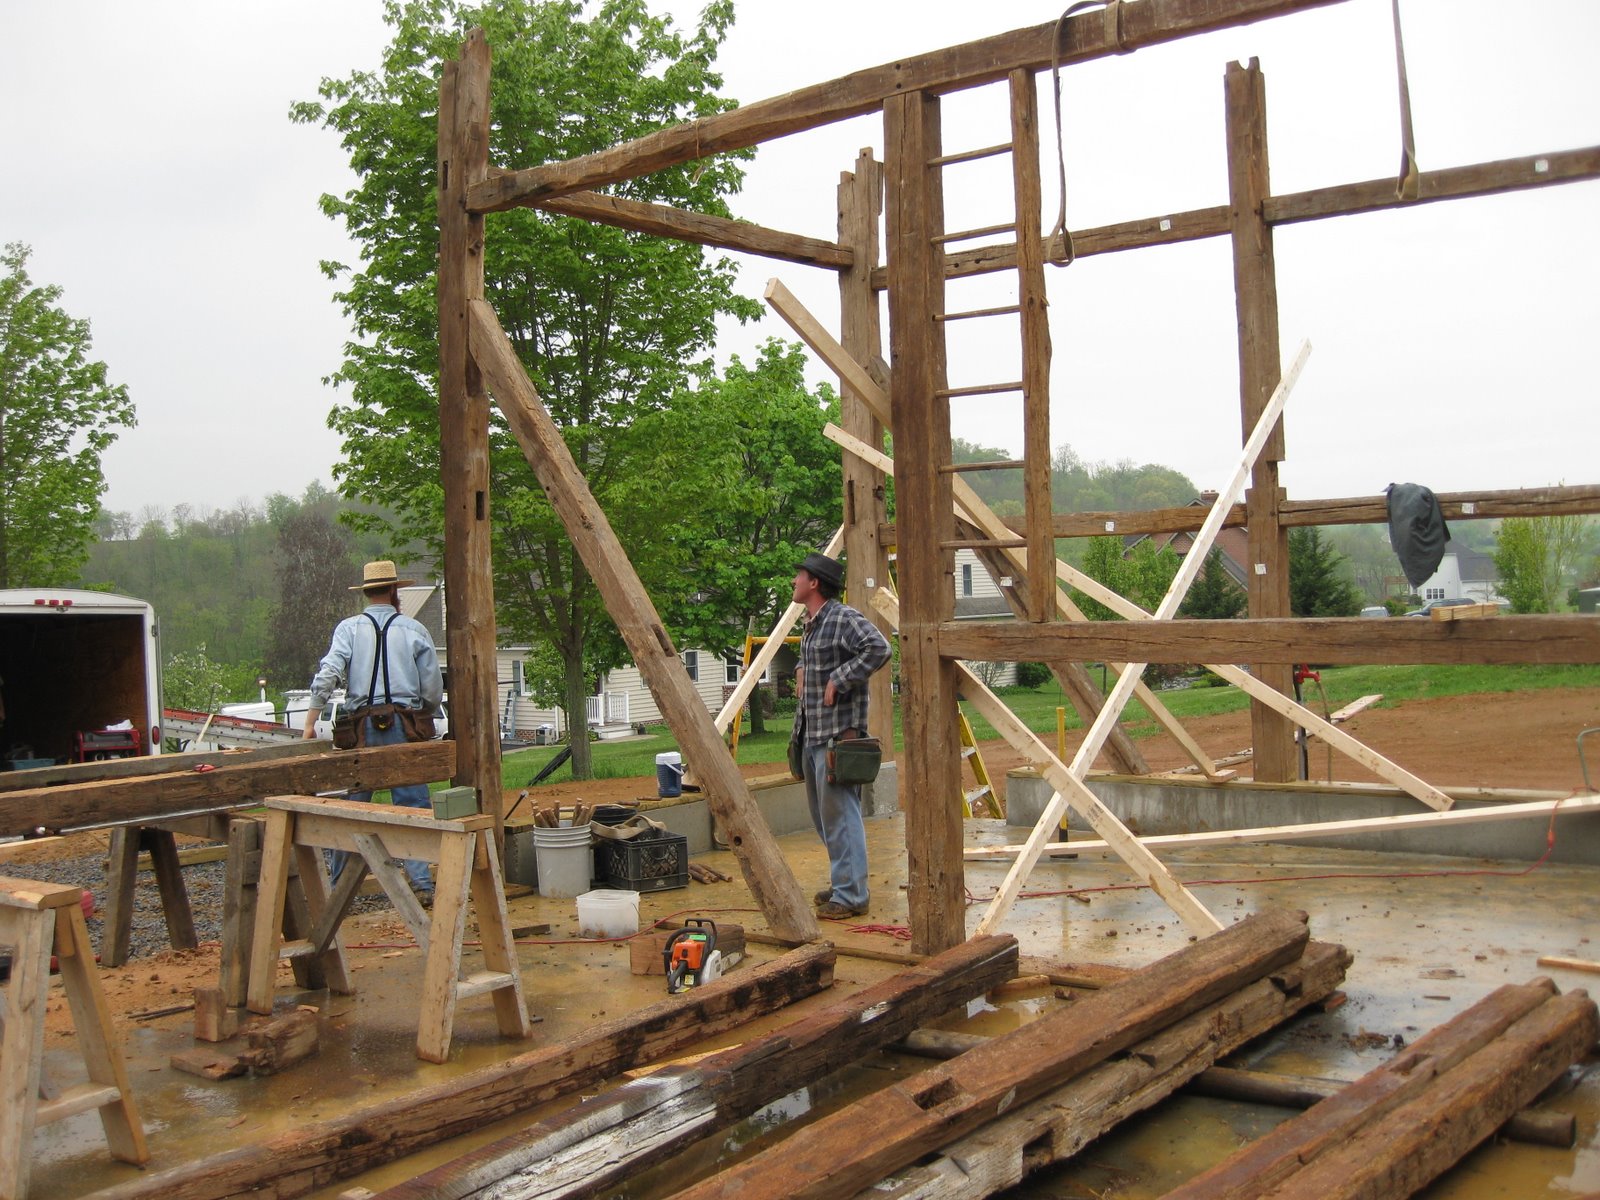
Installing the queen post. The queen beam is a 50 ft piece of wood cut from one tree. The eve beams and the queen beams are all 50 ft long.


Anthony and Phillip installing the queen post. This was a pretty windy day and they walked around like they were on the ground.


I wish I could get a closeup of it but Anthony has an interesting place to keep his pencil so that it is handy. He keeps it inside his beard under his mouth. The first time I saw it I couldn't believe it.


This is the crew from Old Valley Barnwood that I bought the barn from and are they are the ones erecting the barn. Anthony Hess is the 2nd from the right and he is the owner I believe. Next to him to the left is Phillip and he appears to be a true craftsman.
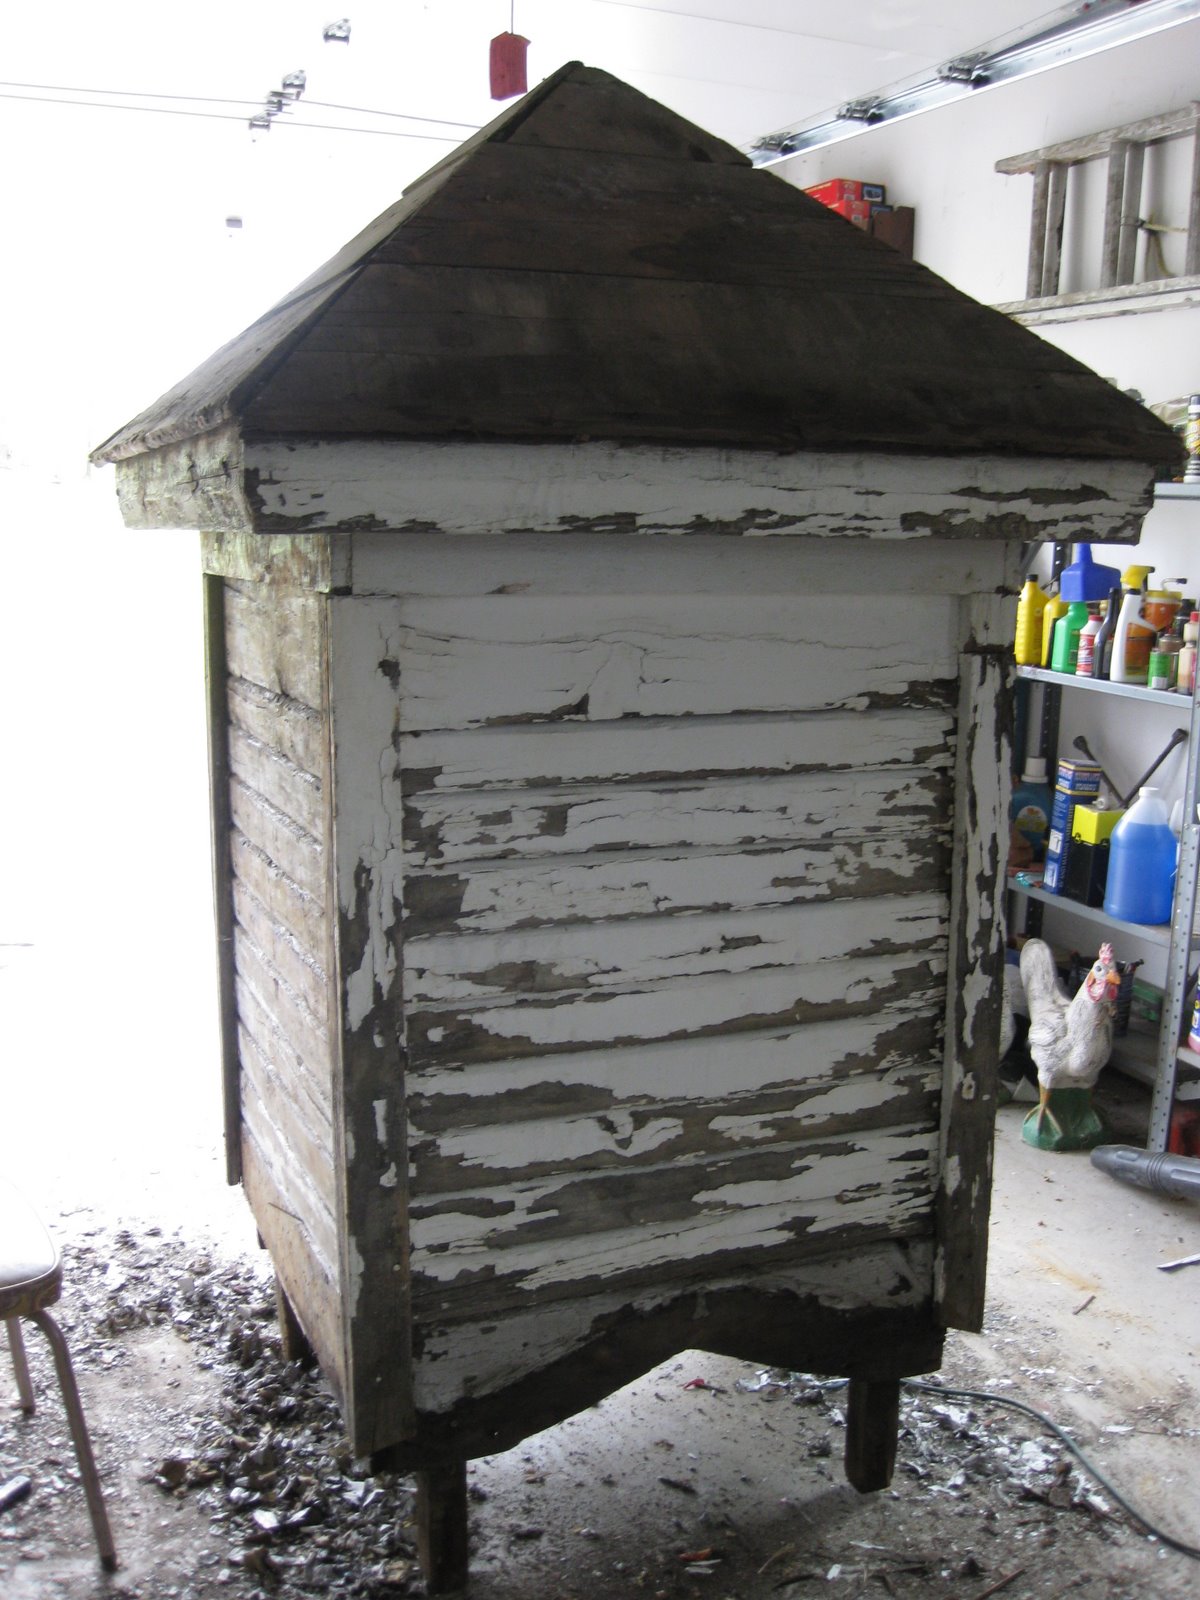
Posted by Picasa

Tuesday, April 27, 2010

Day 2 of building the barn


Real progress today. All of the bents are up and they all fit into the correct areas. All of the bays except bent E are mirror images of each other. Bent E had a granary so it is a little different.


A nice view from up on the hill.


A side view. Notice Bent E is a little different in the back.


A front view.
Posted by Picasa

Finishing the cupola


The push is on today to finish the cupola. Anthony the barn builder told me that they may be finishing putting up the roof tomorrow and I want to incorporate the cupola into the roof before the Petty Bone leaves.


I drafted my wife Sandy to paint as I put the final pieces onto the cupola. You can judge the size of the cupola with her standing next to it.


The finished product.


Sandy touching up.
Posted by Picasa

Monday, April 26, 2010

Cupola Progress


The cupola repair is in progress. I have been trying to get it ready so that it can be lifted in place with the Petty bone. Here it has been painted the color we chose for the barn. The roof has tar paper and drip edge on it. The tar paper was not really necessary but I wanted to make sure there were no leaks because of the location. This will have a metal roof similar to the one I am going to install on the barn,


Here is the base I am building. The inside dimension is 3/4 of an inch bigger than the outside of the cupola and it slides right in. I am putting 1 X 10 tongue and groove , white pine boards on it. This frame will be incorporated into the roof and the cupola will fit right into it.
Posted by Picasa

Installing the first Bent


Bents E and D being constructed. Each one is being held in place by a 16 foot 2 by 4. Bents B, C and D have ladders incorporated into the frame. These were used when hay was being loaded. It allowed the farmer to get to the top of the pile without setting up a ladder.


This shows the huge wind braces that are installed to the posts. Each one is about 11 feet long.


This is Anthony doing some calculations. The wall posts are 12 inches shorter around the perimeter.


Putting bent D together. Everything has to be done in the correct progression.
Posted by Picasa

Getting Started


Finally the men are here to start putting the barn back together. The crew leader is Anthony Hess and he has three workers with him. I met Phillip during the dismantling process in Reading.


This is just a giant jigsaw puzzle at this point. About 100 pieces. Each one has a label on it and Anthony has a chart that shows where it all goes.

Posted by Picasa

Sunday, April 18, 2010

Installing the Sill Plate


I installed the sill plate and the deck plate on Saturday. It took most of the day. Each 2 by 10 has a material called sill seal underneath to stop bugs and debris from getting under the sill plate.


This view finally shows how the bents will be located in the barn. Each of the posts gets bolted to the deck plating.

Posted by Picasa

Stripping the Cupola


About 6 hours worth of stripping with a heat gun and most of the paint is off. I ended up with a 5 gallon bucket full of paint chips. Almost everything will stay except for the corner pieces which are pretty weathered. I have some mahogany in the basement that should hold up pretty well for that.


We are debating whether to spend the money for a copper roof or use the same roofing material I am putting on the barn. The copper coil stock is very expensive.
Posted by Picasa

The Cupola


We bought this Cupola in Newville PA. It came from a hardware store in Ephrata PA that was demolished. It looks a little rough but structurally it seems intact. I'll know more after I strip the paint off and take the metal off of the roof.
Posted by Picasa